Pita bread is incredibly easy, even if you've never baked bread before. The ingredients are flour (I use a mix of bread and wheat flours), sugar, salt, olive oil, yeast, and water.
Like with most breads, you start off by blooming the yeast, so I added a tablespoon each of yeast and sugar to a cup and a half of warm water in my mixing bowl, where I let it sit for about five minutes to activate.
I then mixed in four cups of flour and a tablespoon of olive oil using the dough hook on my mixer. You will also need to scrape down the side of the bowl to fully incorporate the flour. After the dough had come together in to a ball I added two teaspoons of salt.
Next I kneaded the dough with my mixer for about ten minutes, until it was nice and elasticee (sp?).
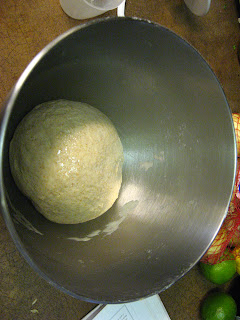
I covered the bowl with a kitchen towel and allowed it to rise for about an hour and a half. I then pulled the dough out of the bowl, placed it on the counter, and pressed it down with my finger tips to deflate it. After that, I cut the ball in to ten or twelve smaller pieces and rolled each one between my hands and the counter to form a tight ball. You can vary the size of these balls depending on how large you want your finished pita to be.
I covered the dough balls with a towel so they wouldn't dry out while I worked through the rest of the steps. I had preheated the oven to 400F with my baking stone on the lowest rack. The pitas could be baked on a normal cookie sheet as well.
I rolled out one ball at a time with my rolling pin until the dough was roughly circle and about a quarter inch thick. The thinner the dough the crispier the pita will turn out which isn't always ideal.
When using a stone you do have to bake each pita separately but they cook up quickly so it isn't a huge issue. I slid the dough on to the stone and baked on each side for about two and a half minutes. The pita will puff up so after you flip it (I recommend tongs for the flipping) you will want to depress the bread pillow. If you do not deflate the pita the bread will be too crispy.
After baking and cooling all the bread, I bagged it and tossed it in the freezer for use later in the week. Fresh pita can start to mold after a few days (because of the lack of delicious preservatives) so storing it in the freezer is a good idea if you don't have a bowl full of hummus ready for it.
For reading all the way to the end of this post you have been rewarded with a video of the pita puffing. This is in real time and the video starts right after I put the bread on the stone.


Great post Seth! I'm going to try this tomorrow, and thank you for adding the freezer tip! :)
ReplyDeleteI hope they turned out for you
ReplyDelete